Our Log Home Restoration Story
So…
My life has suddenly become extremely busy and stressful as all my free time seems to be taken up by home maintenance. Obviously this is first-world-problem stuff - I’m grateful that I own a home at all. However, when we bought our house it looked like it had wooden siding, even our inspector said it had wooden siding………the sellers said it was solid log walls. Well, we should’ve listened to the sellers cause we got a log cabin! And it turns out a log cabin requires a lot of specific maintenance to keep it in good shape. We didn’t know this for the three years we’ve had the house, so we just let the “siding” get even worse (rotten wood was visible when we bought it) figuring it’d be easy to replace in a couple years. WRONG!
The previous owners painted the outside with a heavy duty latex paint. Sounds like a good plan! Apparently it’s not a great long term plan for a log home. As the logs “breathe” with the seasons, slightly expanding in the summers and shrinking in the winters, the paint doesn’t breathe with the logs and forms cracks. These cracks create a moisture trap. Rain gets in and has no way out, causing accelerated rotting of the wood, which attracts wood-destroying insects.
Now, I don’t blame any of the previous owners for doing this. It took research for me to learn the “right” things. They may have painted the house for any slew of reasons as well. Painting is quick and easy, and relatively inexpensive, it covers up imperfections easily, and in theory if you do it often enough, the cracks get filled with more paint! A log repair contractor is extremely expensive, takes a lot of time, and requires a lot of tedious maintenance. And they are also booked out years in advance at the moment.
Now to the fun part.
We first hired a log repair company to come out and fix our rotten sections of logs. Their plan was to fix the worst sections in the fall (2022) and come back out in the spring (2023) to sandblast the paint off the house and fix any additional rotten wood before staining the house. We took them up on the initial log repair, and paid them thousands of dollars to do it. When they were delayed to mid-summer 2023 to return to finish the house, we decided we’d rather not spend the money anyway and fix it ourselves. It would save us likely 25 grand in total, and it would teach us how to care for our cabin properly.
Enter the ants!
During the spring and summer we discovered an ant problem. They were all over our house, and tree outside, and in our kitchen. We discovered the nest in the tree and paid a company to remove it. We also got an exterminator to coincide with the tree removal to nip it in the bud. Well, it didn’t really work because the ants had already developed a satellite colony in our bathroom window frame! It took about a month to find it, zeroing in on ant trails and figuring out where we’re seeing them the most often, yadda yadda.
The window frame/logs around the window were so rotten it crumbled in our hands as we pulled it down. A swarm of ants at the base of the frame scattered and tried to grab all their eggs up and escape us giant humans destroying their perfect home. Sadly, most of them didn’t make it. The window frame basically crumbled into our hands and fell out of the house because of how rotten it was.
Big big thank you to my stepdad for installing a new window for us. The crumbling window event happened the day before my birthday, and he drove up the very next day to install a new window for us at a moments notice. They say actions speak louder than words…Paul always helps when he can, what a saint. And on my birthday! I could only hope to be so selfless in my life, I don’t think it’s attainable. He’s one of a kind. THANK YOU PAUL! We love you lots.
Anyway, the ant battle is ongoing. We aren’t sure if we killed the queen or not. It’s possible that as we find more ants, they are just stragglers surviving until they die and the queen is dead, so no more new ants are being born. Or, as we fix one side of our house, they move to a new section of rotten wood I haven’t gotten to yet. This is a big downside of fixing our log cabin ourselves. It takes WAY more time, start to finish, to fix. Especially since I already work as a goeologist for roughly 45 hours a week, so I am limited to working after work and weekends, and can only work on the logs during nice weather. So it just takes forever.
Now! To fix a rotten section of log, you cut out the rotten wood until you get down to the good wood, then you cut a new piece of wood to fit, and replace it with the new piece! Sounds easy until you understand that I have zero woodworking experience. With the help of Paul, I gained enough skills to use a table saw, miter saw, and some power tools. I’m not even close to expert status, maybe not even beginner, but it’s enough to get the job done. THANKS AGAIN PAUL!!
After the rotten log sections are fixed, the paint needs to be removed. I tried a few methods for this and found the best option to be a tool called a “paint-eater” It’s basically a rough sanding disk on an angle grinder-type tool. It grinds away the paint in a circular motion until it gets through all the paint and down to the wood. It takes a long time but it’s effective, and way cheaper than hiring a company to sandblast, or rent a sandblaster (which is the industry standard method). Both are too expensive for us cheap-o’s.
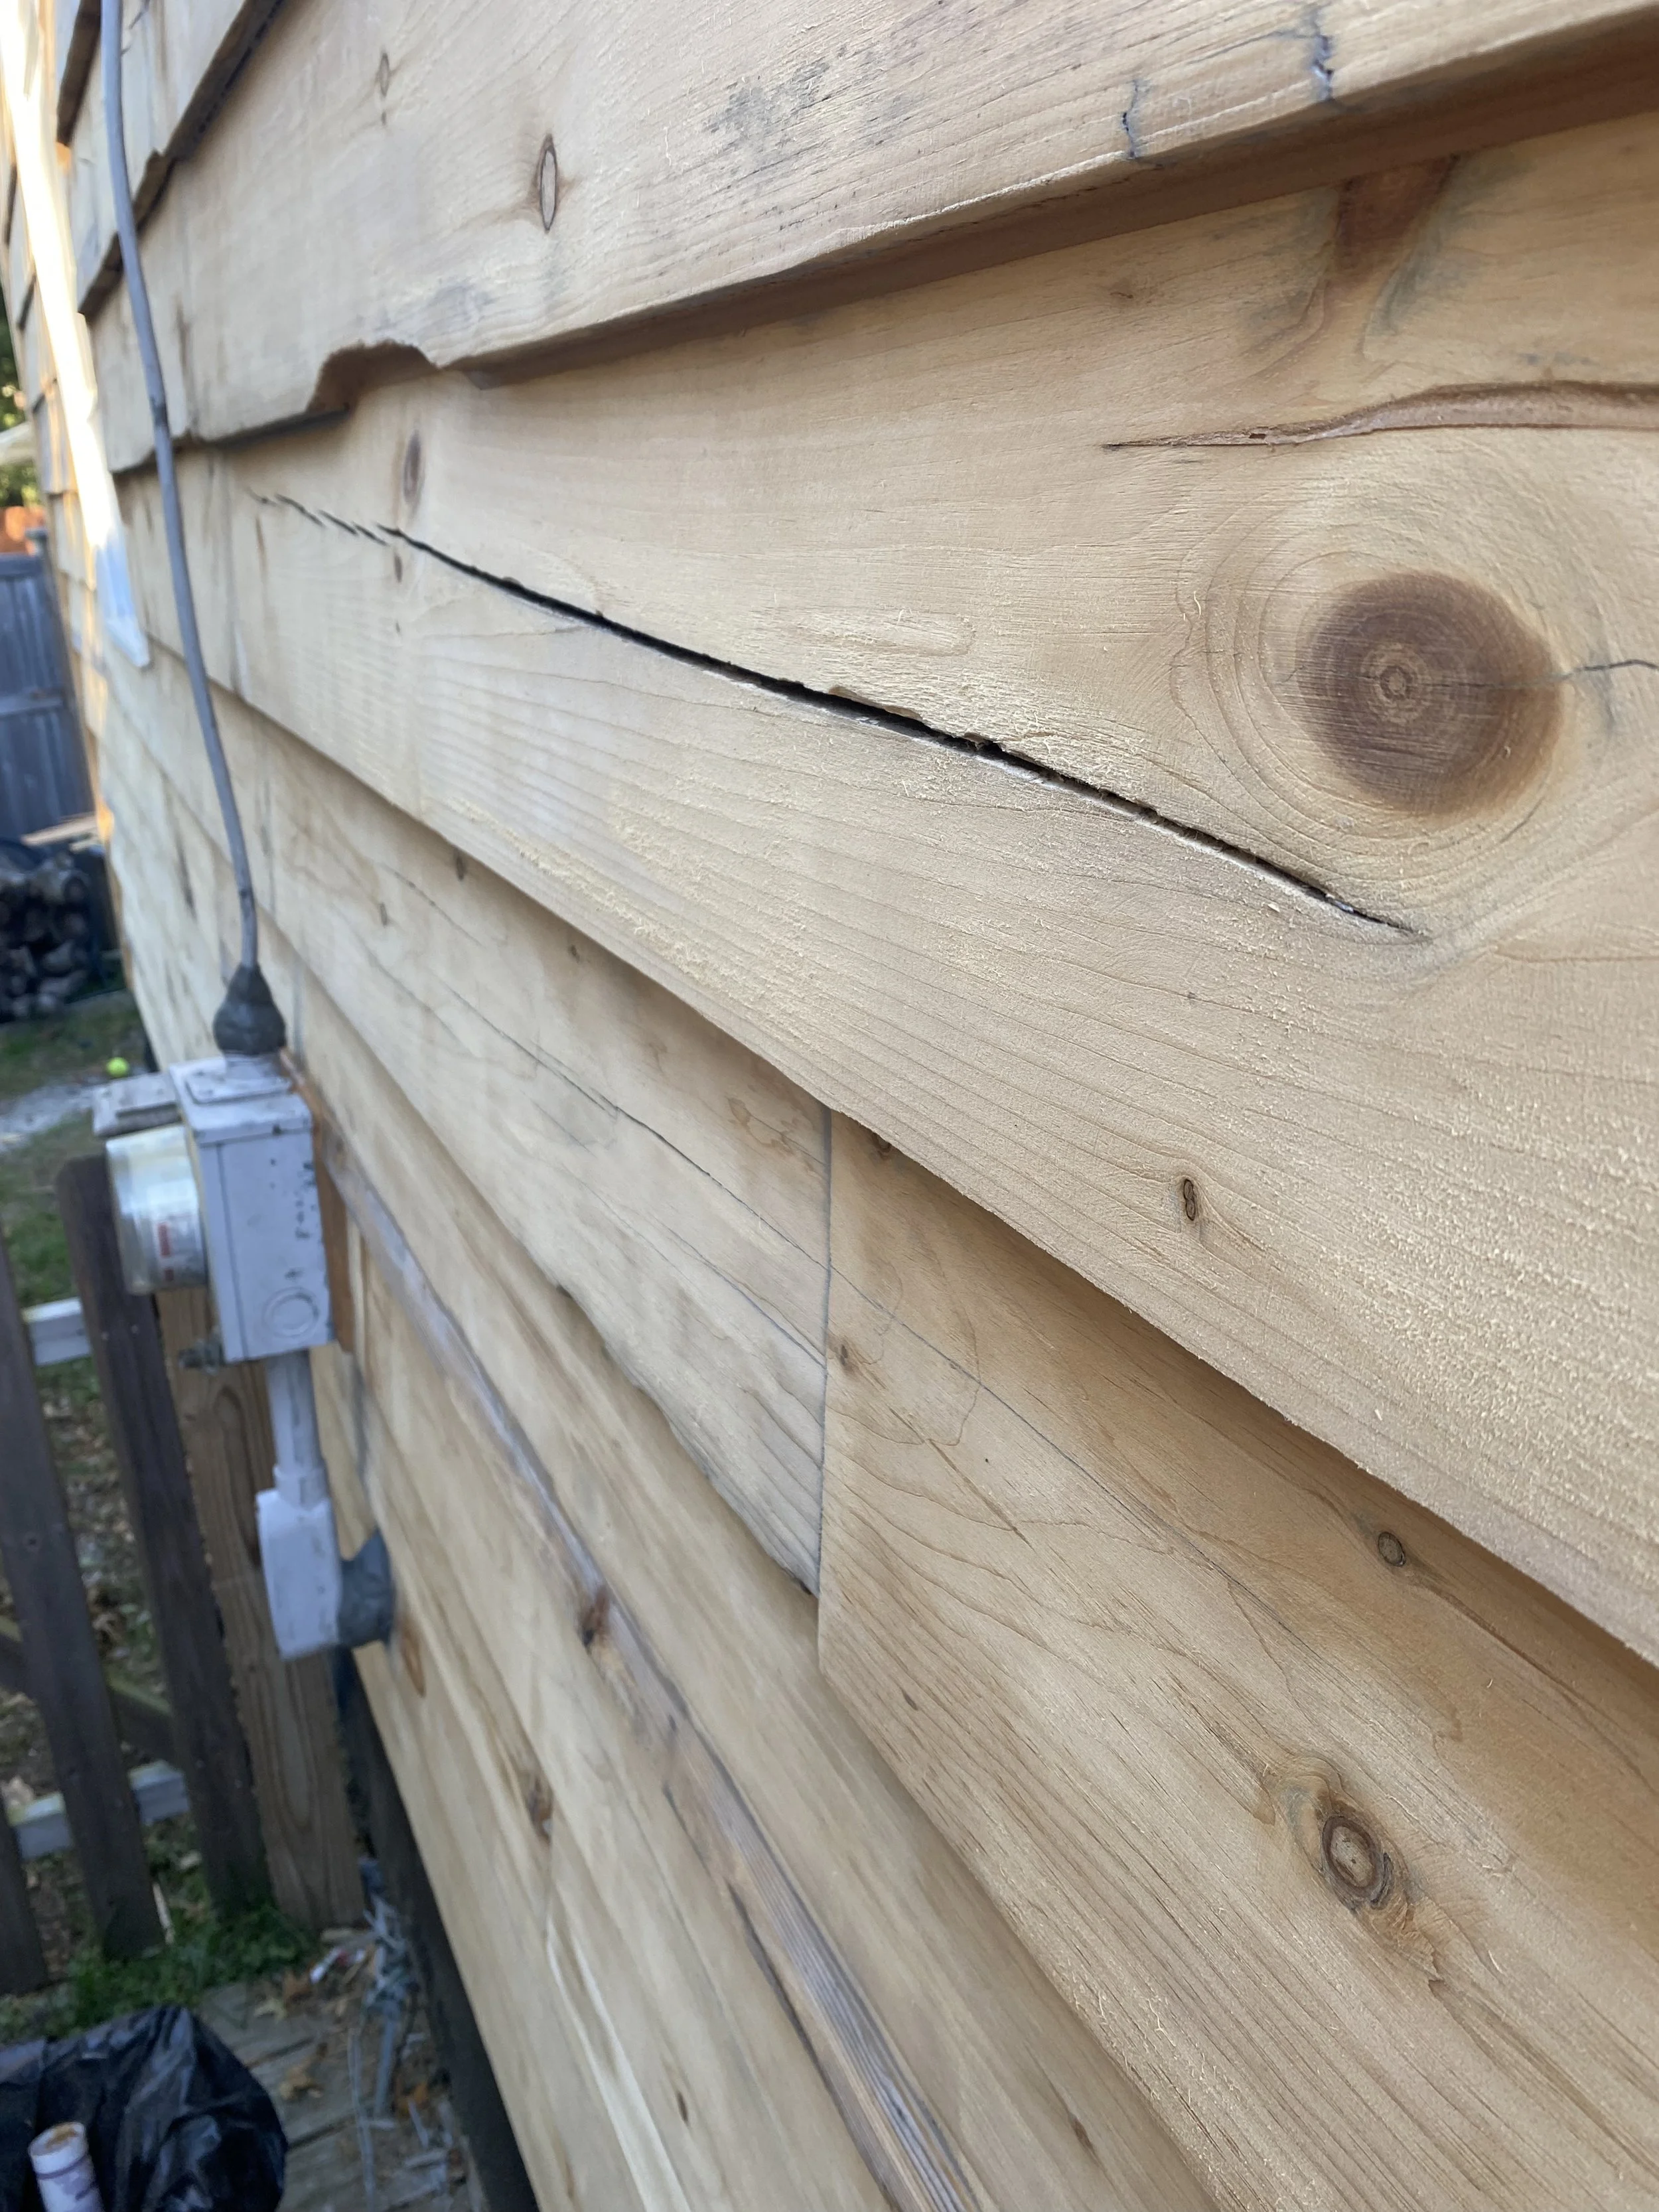
Once the paint is gone, any uncovered rotten logs can be fixed. At this point, any previously existing caulking or sealants need to be removed. Where the logs meet, gaps can form and these gaps are sometimes filled with sealants. Additionally, the shrinking and swelling of the logs can cause cracks, or “checks”, on the face of the logs that need sealed up. So I dug out all previous sealants with hand tools.
The wood is now bare and free of any materials. Time to treat it with wood preservative/pest control liquid, applied with a garden pump sprayer. After it dries, time to refill all those log gaps and checks with new caulking! And you can’t just use any old caulking. Silicone-based sealants that are typically used in bathrooms are no good for the logs, because the become rigid over time and don’t breathe with the logs. We found a log home repair supply company (huge shout out to Permachink) and are using an expanding sealant that stretches and shrinks with the seasons.
At the point that I’m typing this up, new caulking, stain and top coat have all been applied! Keep in mind, this is just for ONE side of the home and it’s taken roughly 2 months (working after work and weekends). At that rate it’s an 8-month project (I can do math). So, hopefully it will be done before summer 2024! We will be limited by the cold temperatures a little bit. Wood preservative treatments, caulking application, and staining are temperature-dependent processes. It needs to be between 40°F-90°F to do any of those things.
One thing is for sure, this house will be just like new after all this work!
Here are some photos/videos that document the rehabilitation of our log home…

This was the first sign inside the house that something was wrong. This is sawdust on top of our guest bathroom toilet, under the window. Turns out as the ants were chewing out their nest in the window frame, they dump the shavings somewhere convenient for them…onto our toilet.

It was around this time we started discovering ants in our kitchen, hired an exterminator and decided to take on the home repair without the help of a professional.

Here is the beginning of sanding. Previous repairs from the log home repair company can be seen, at this point they were done roughly 8 months prior.

At this point the ant problem became more apparent around the window and, well, check out this video to see all the rot that existed and the little bastards that took advantage of it.

RIP - ants and eggs

Our exterminator really had to earn his money on this job for sure.
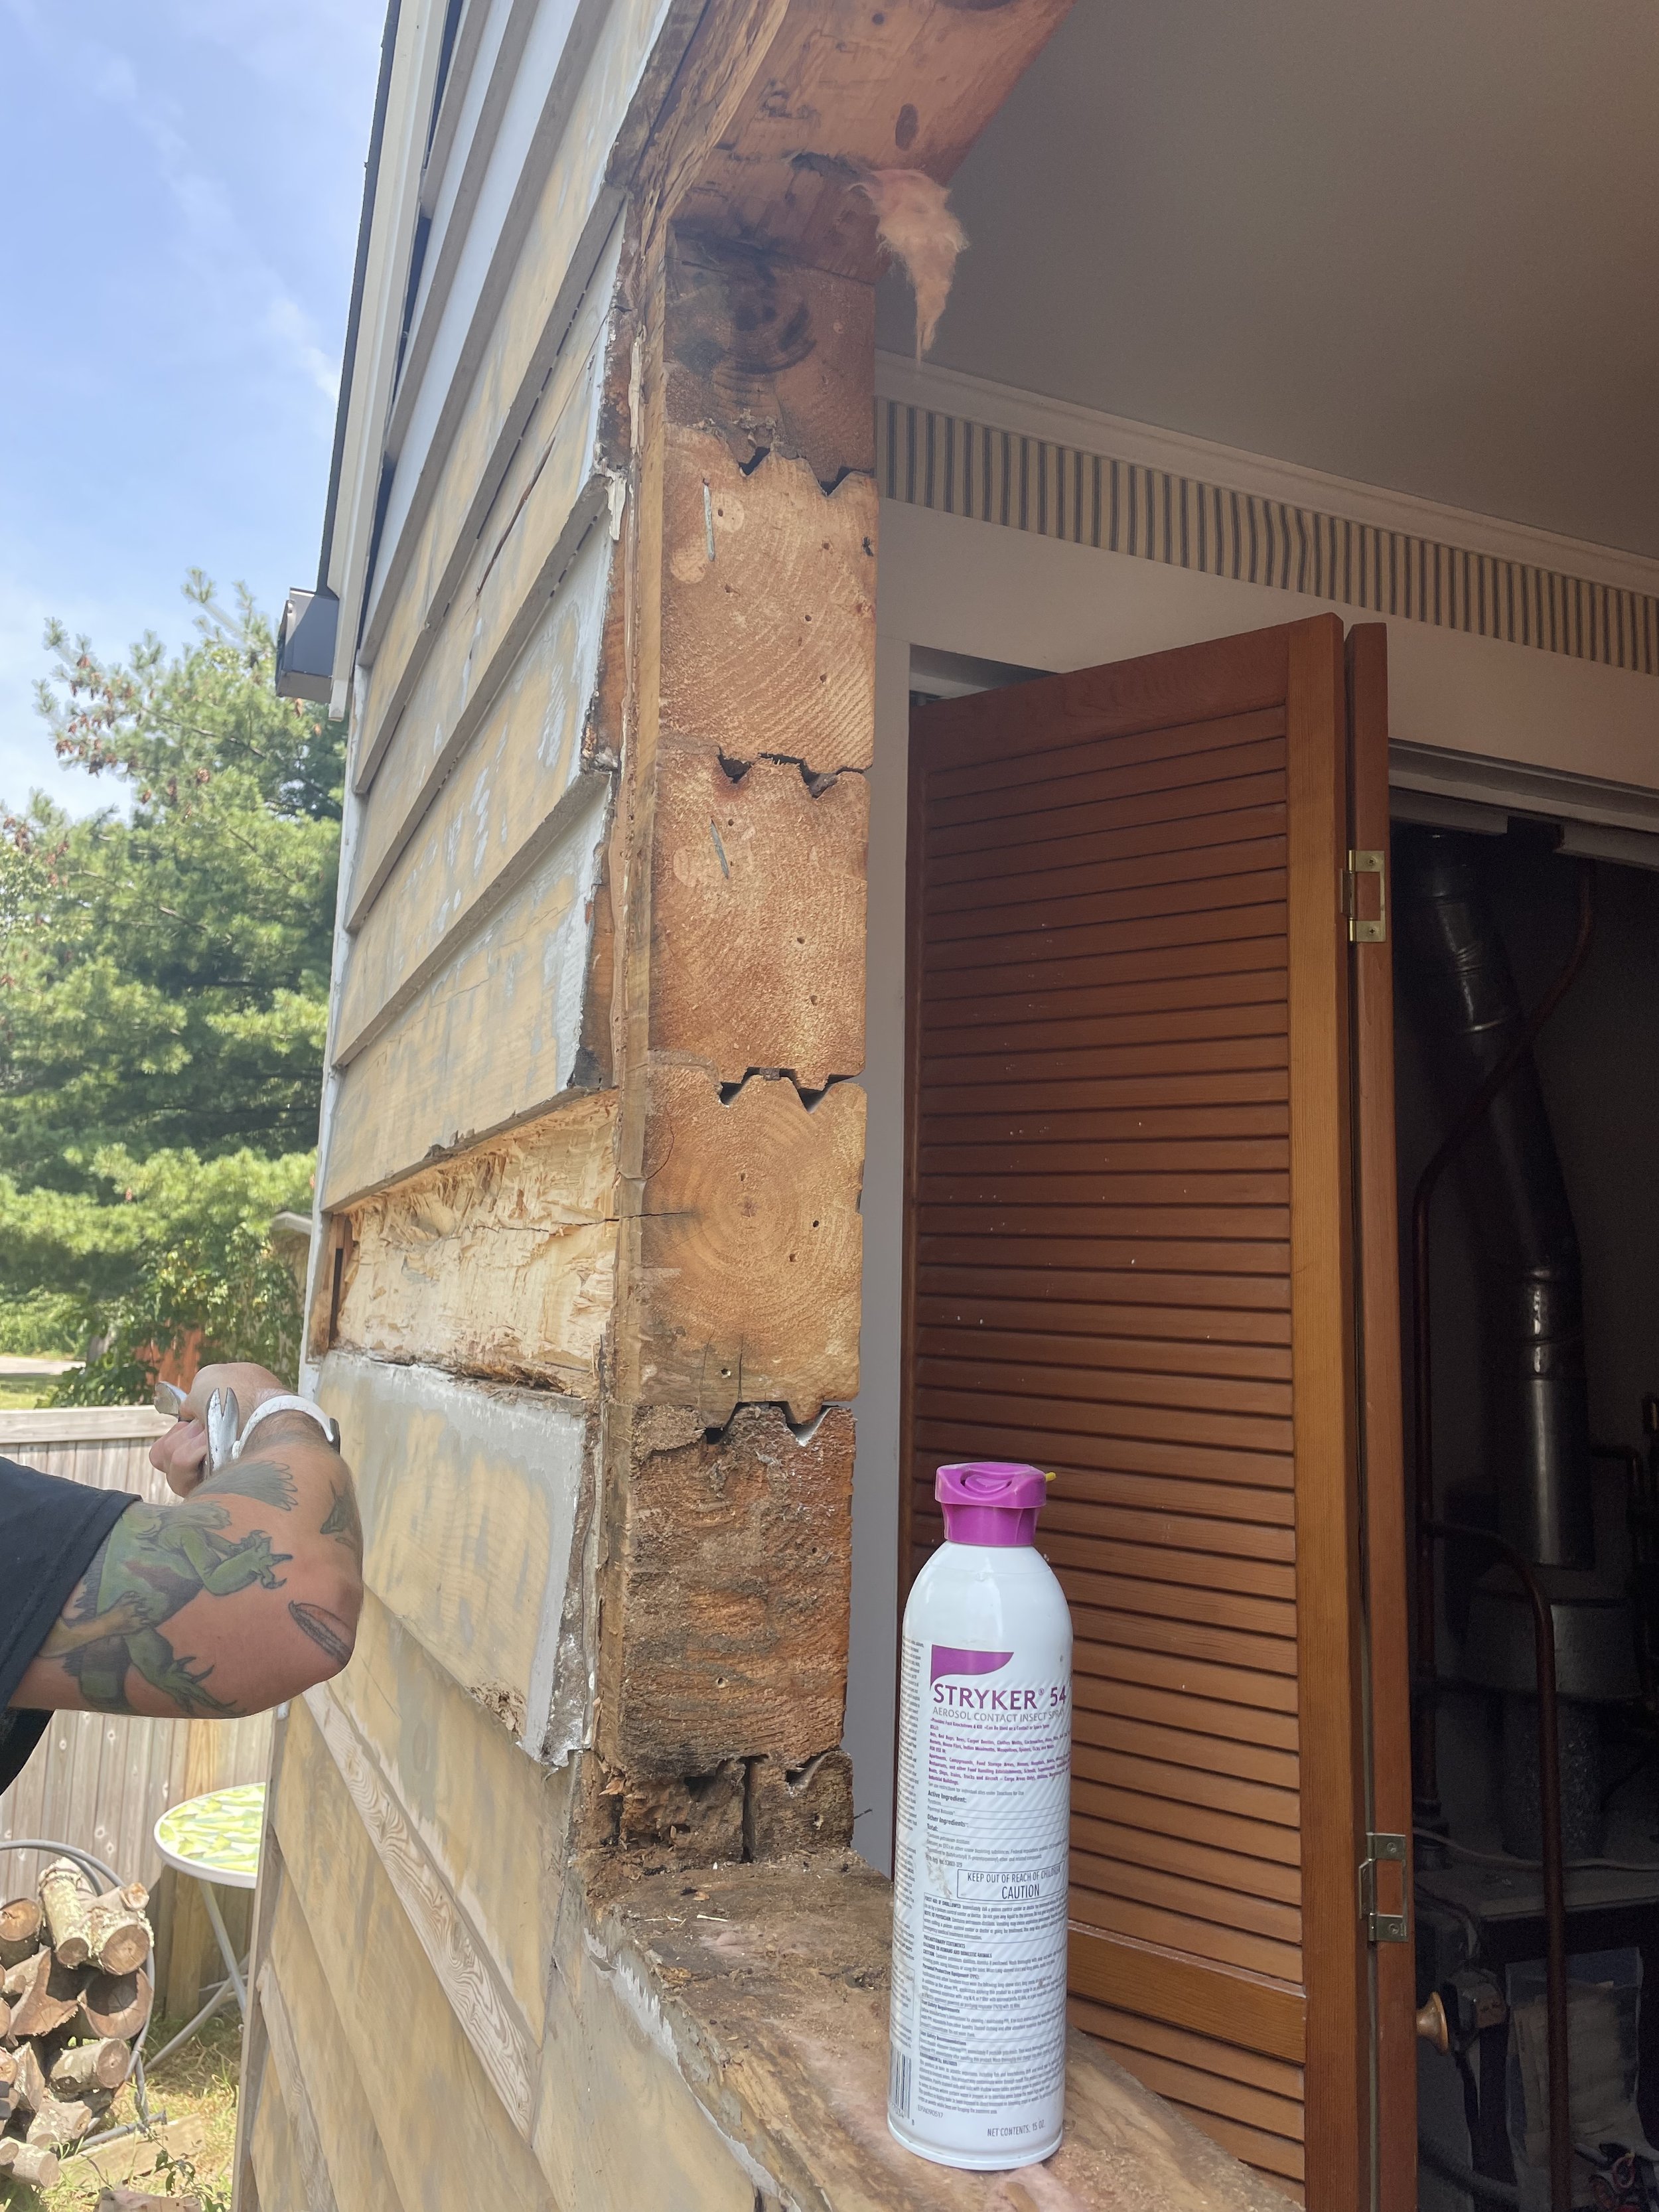
Removing the window did give us our first look at the logs from the side. Pretty neat to see how they were milled with a drip edge on the outside. That is why it looks like wooden siding from the outside. But here is the indisputable proof this house is solid logs. The cracked log and chewed out corner is visible in this photo. That is where the ants were entering the base of the window frame and building their nest.

Suz is over it.

Paul the window wizard!
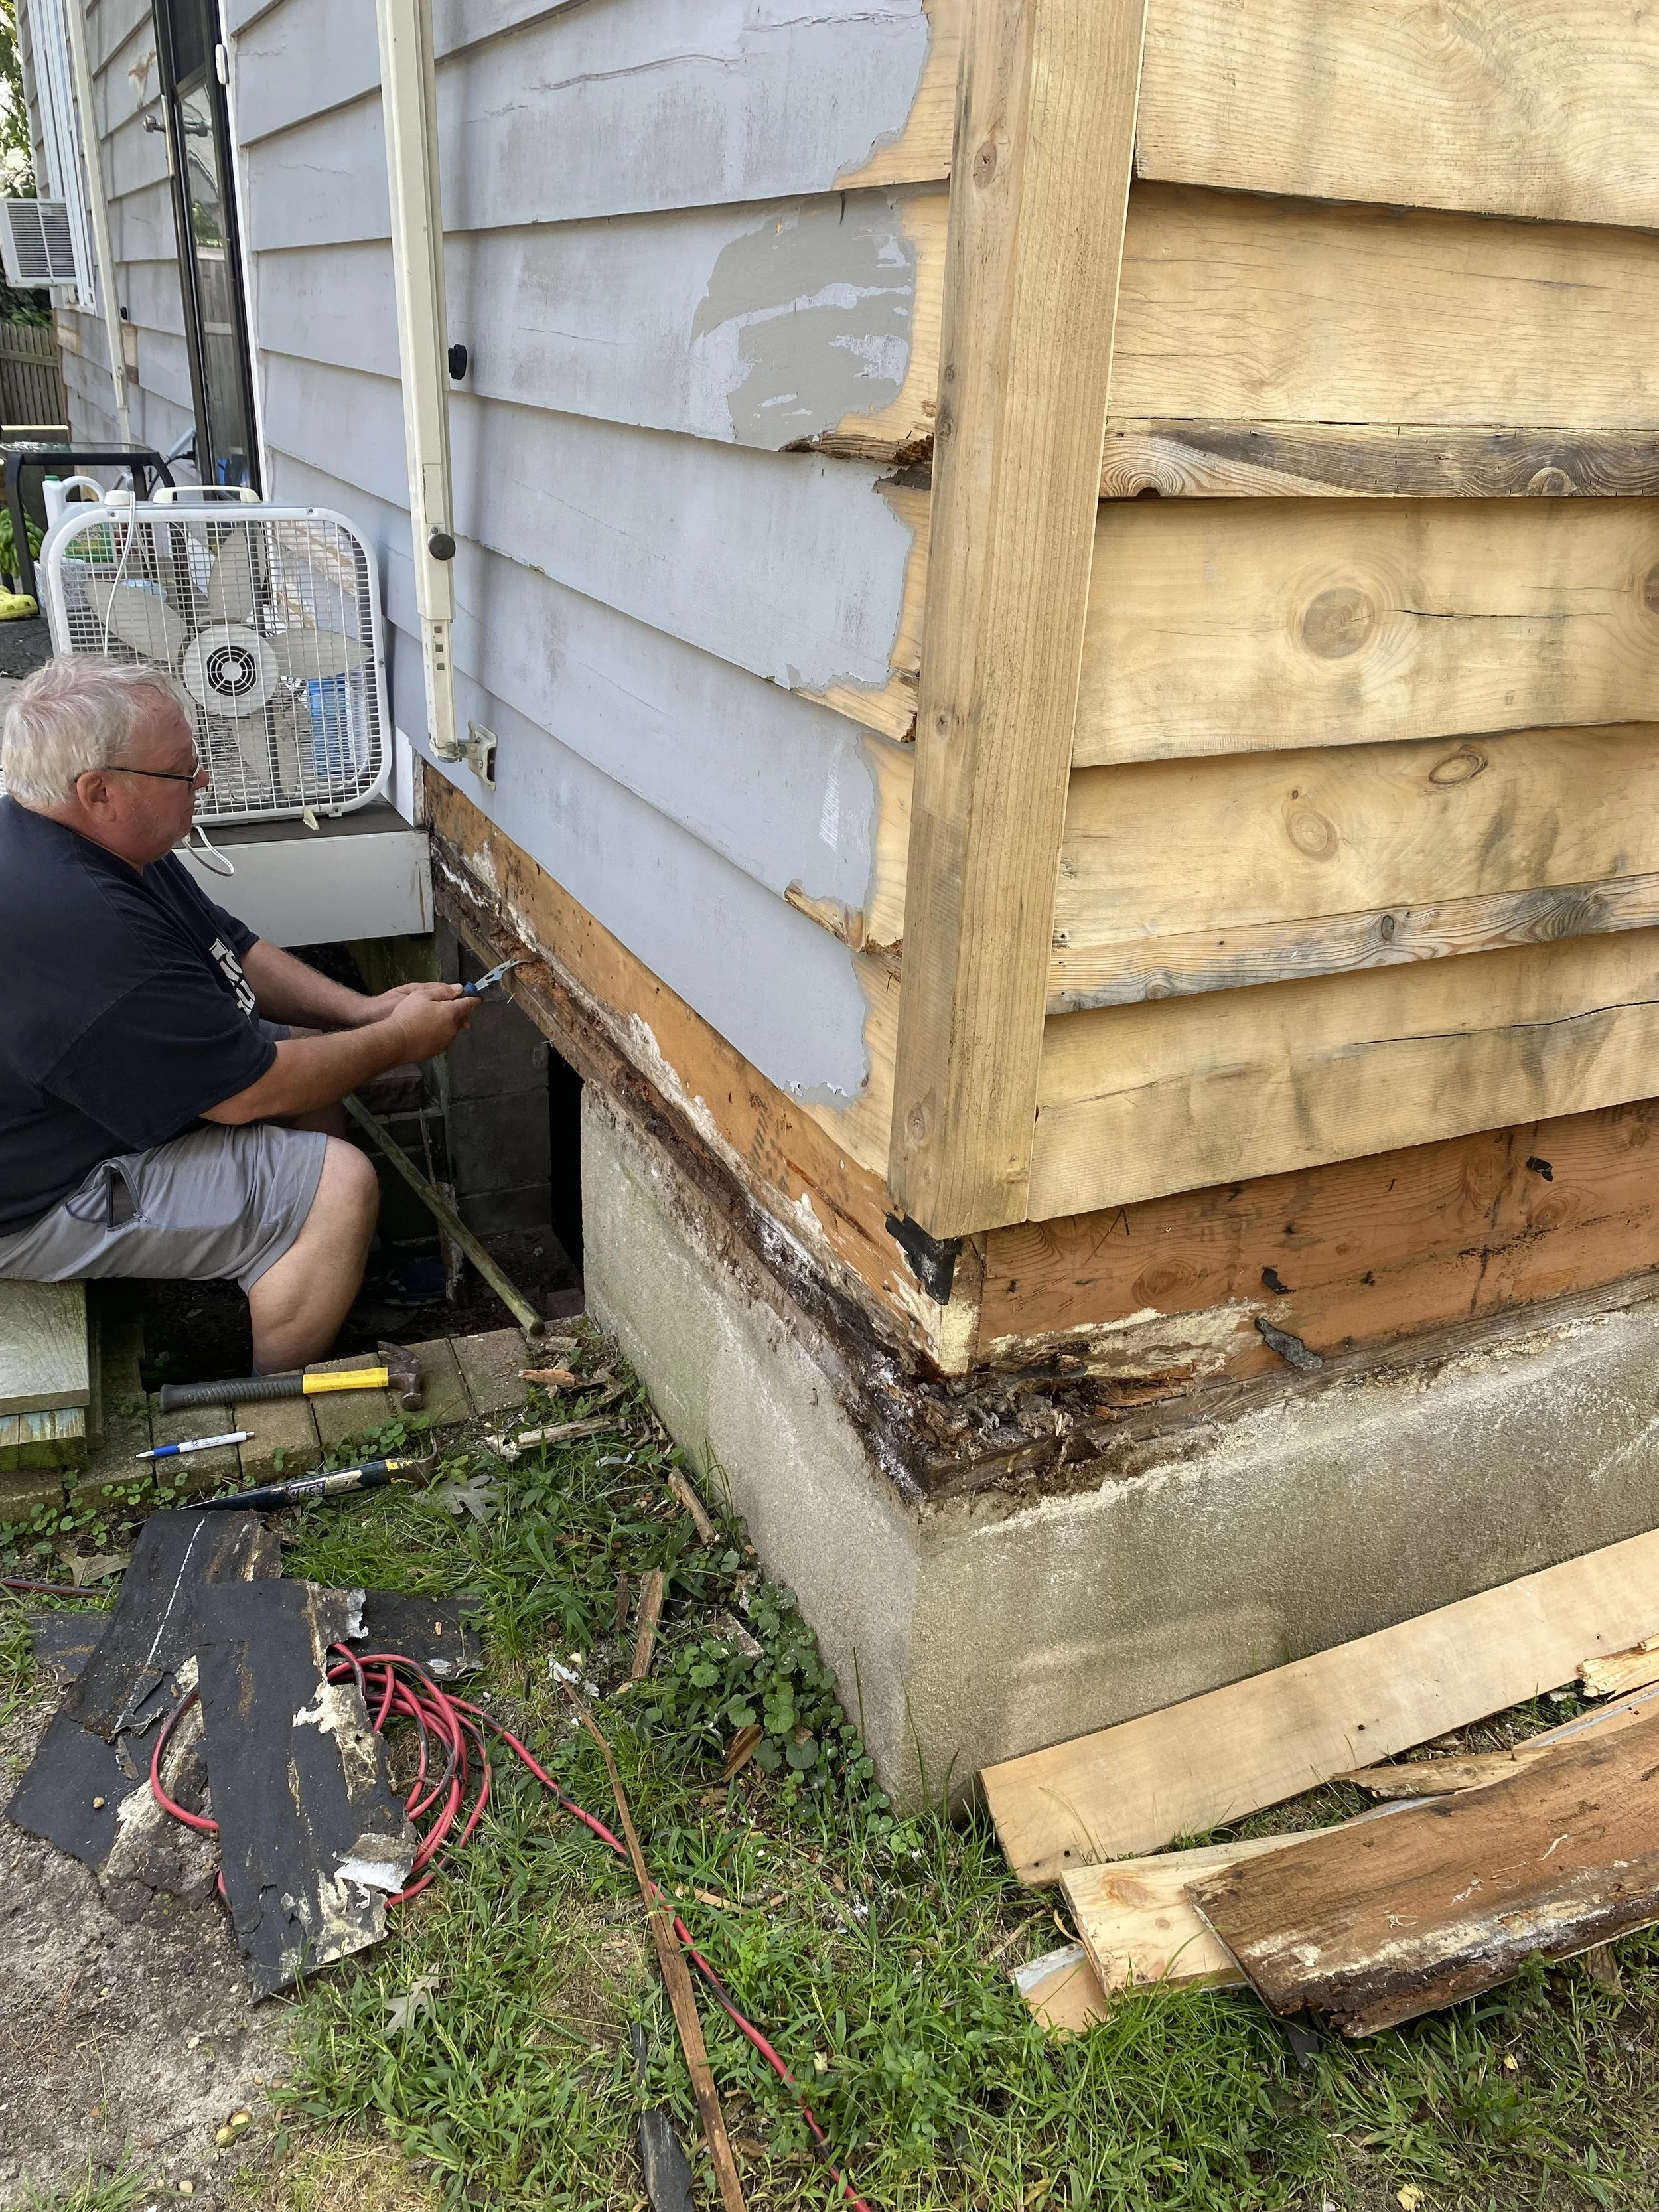
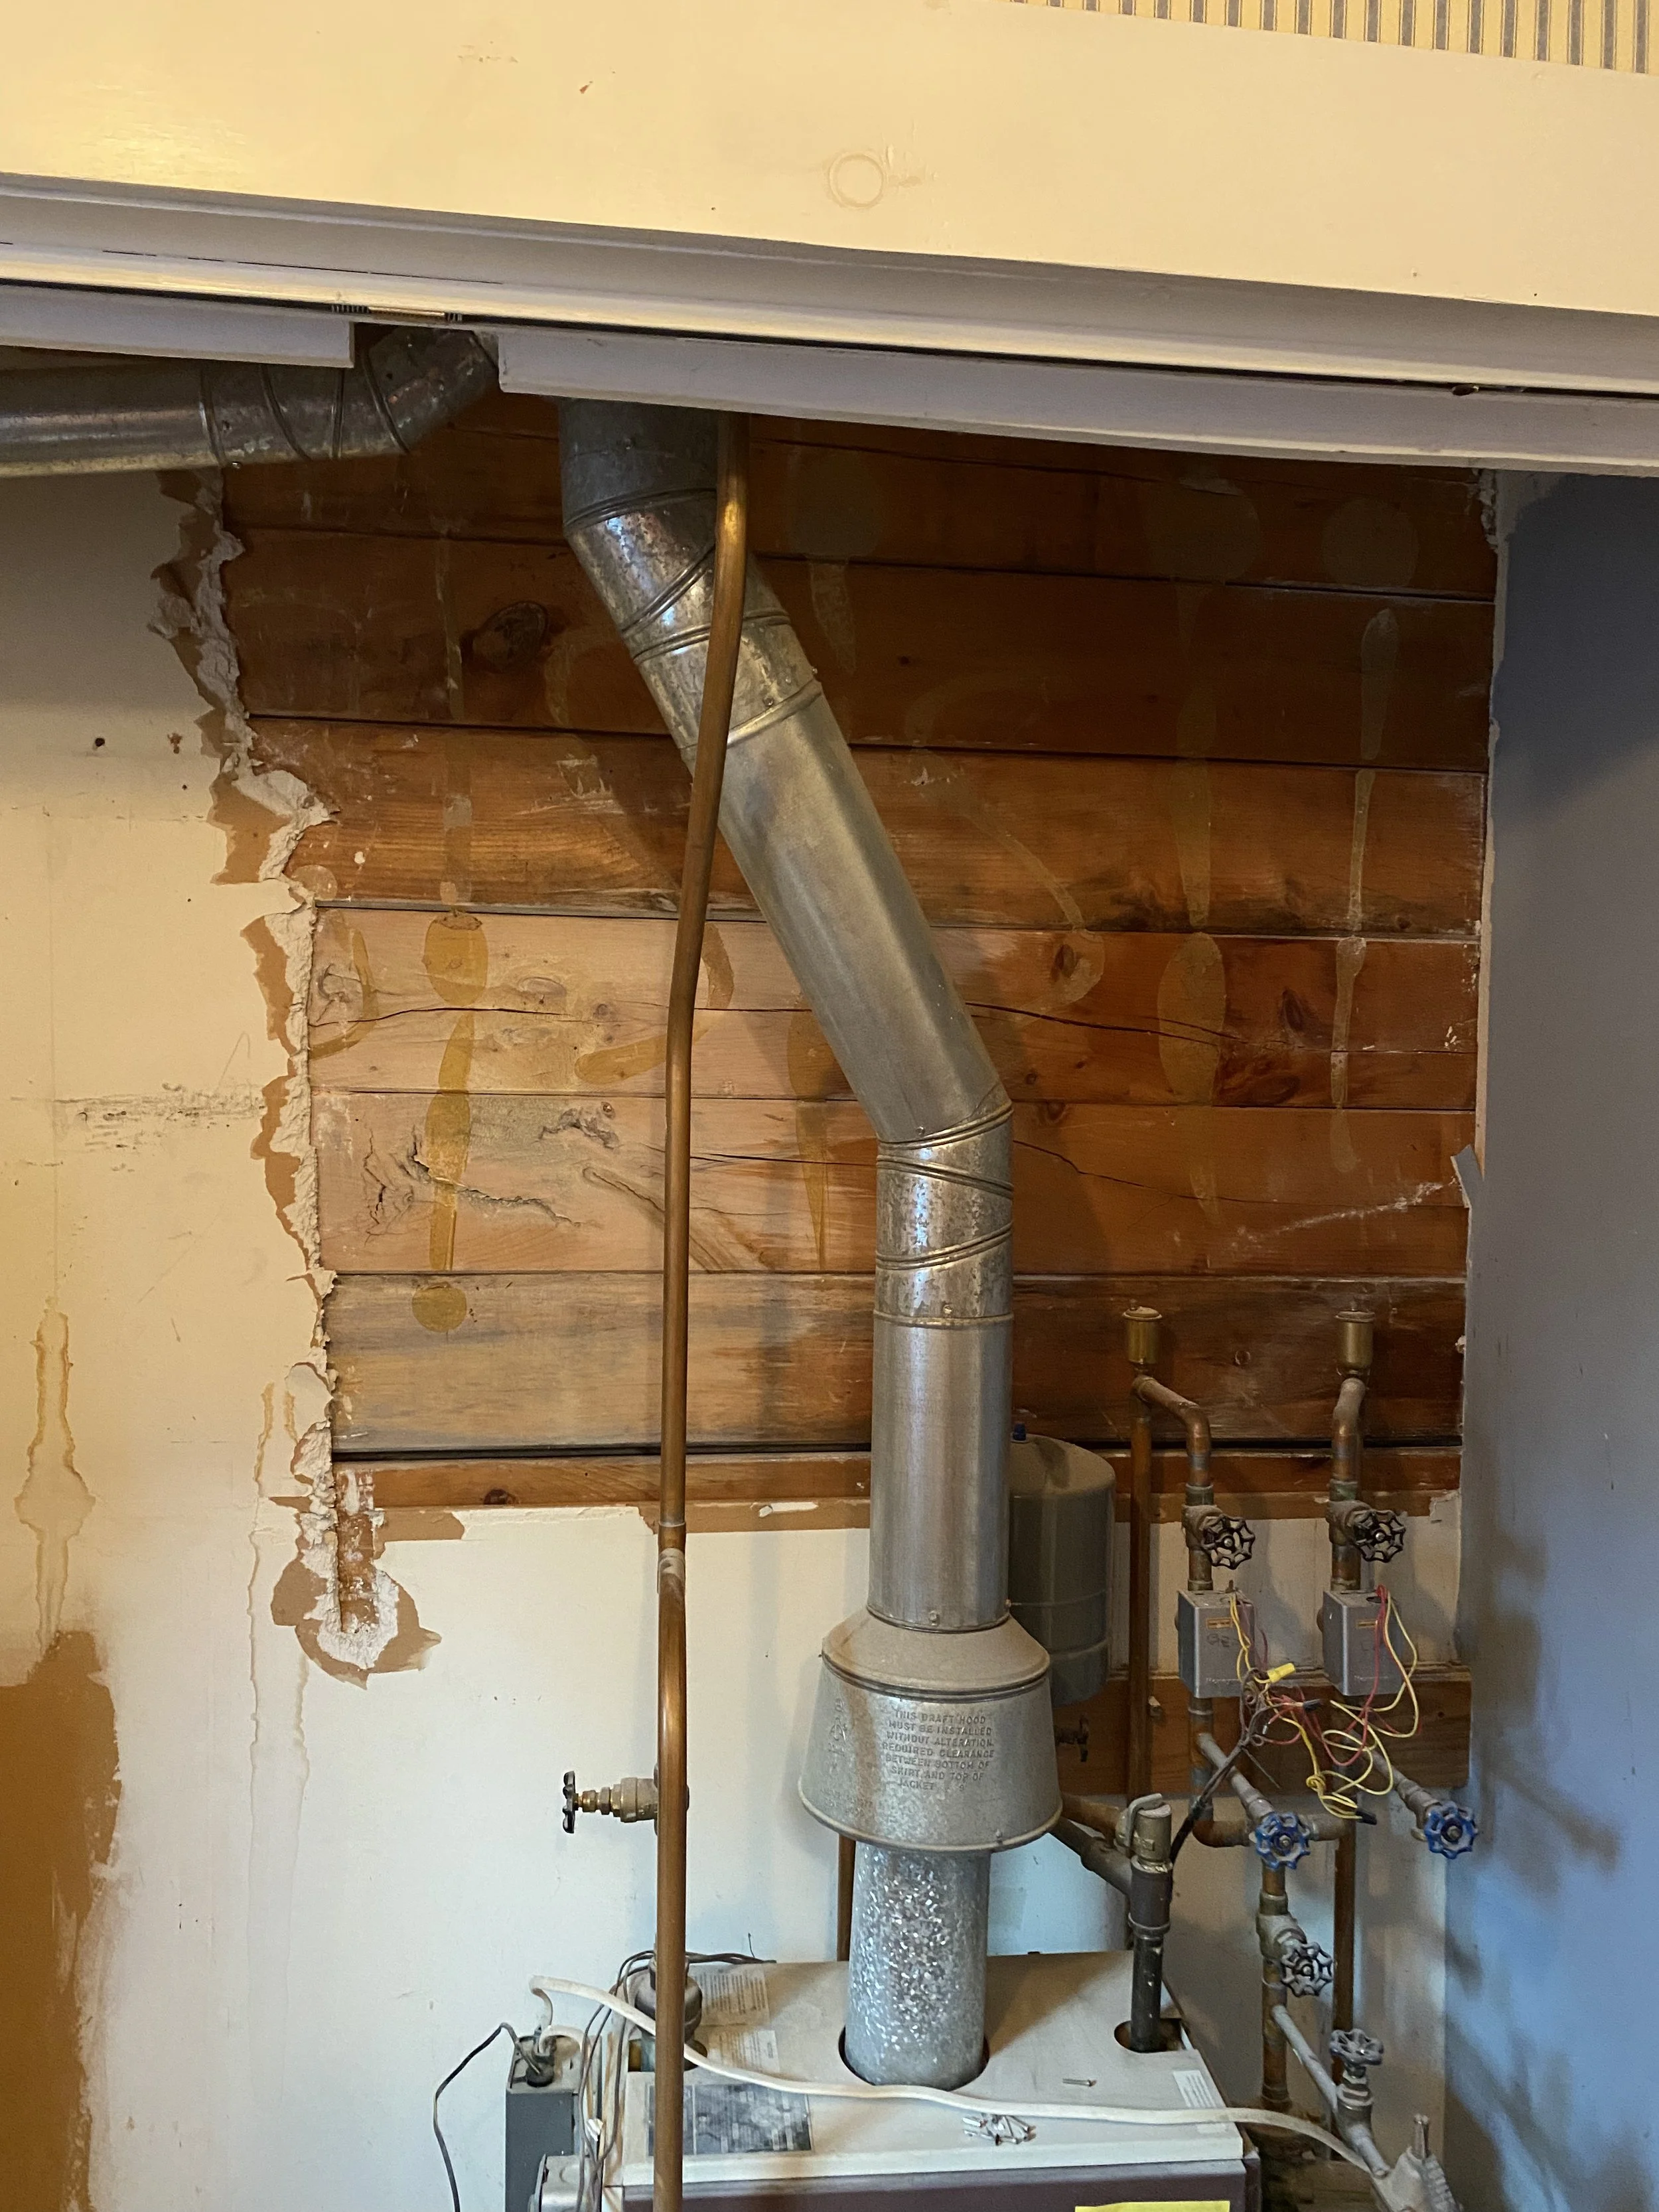
Paul also helped us uncover rotten wood in the rim joist and corner post of the house. The sill plate is actually mostly ok. We also ended up removing some drywall in the utility closet to see if any rot made it to the inside of the house - it was nice and solid in there, thankfully!

After the new window was in, it was time to keep sanding and doing log repairs.
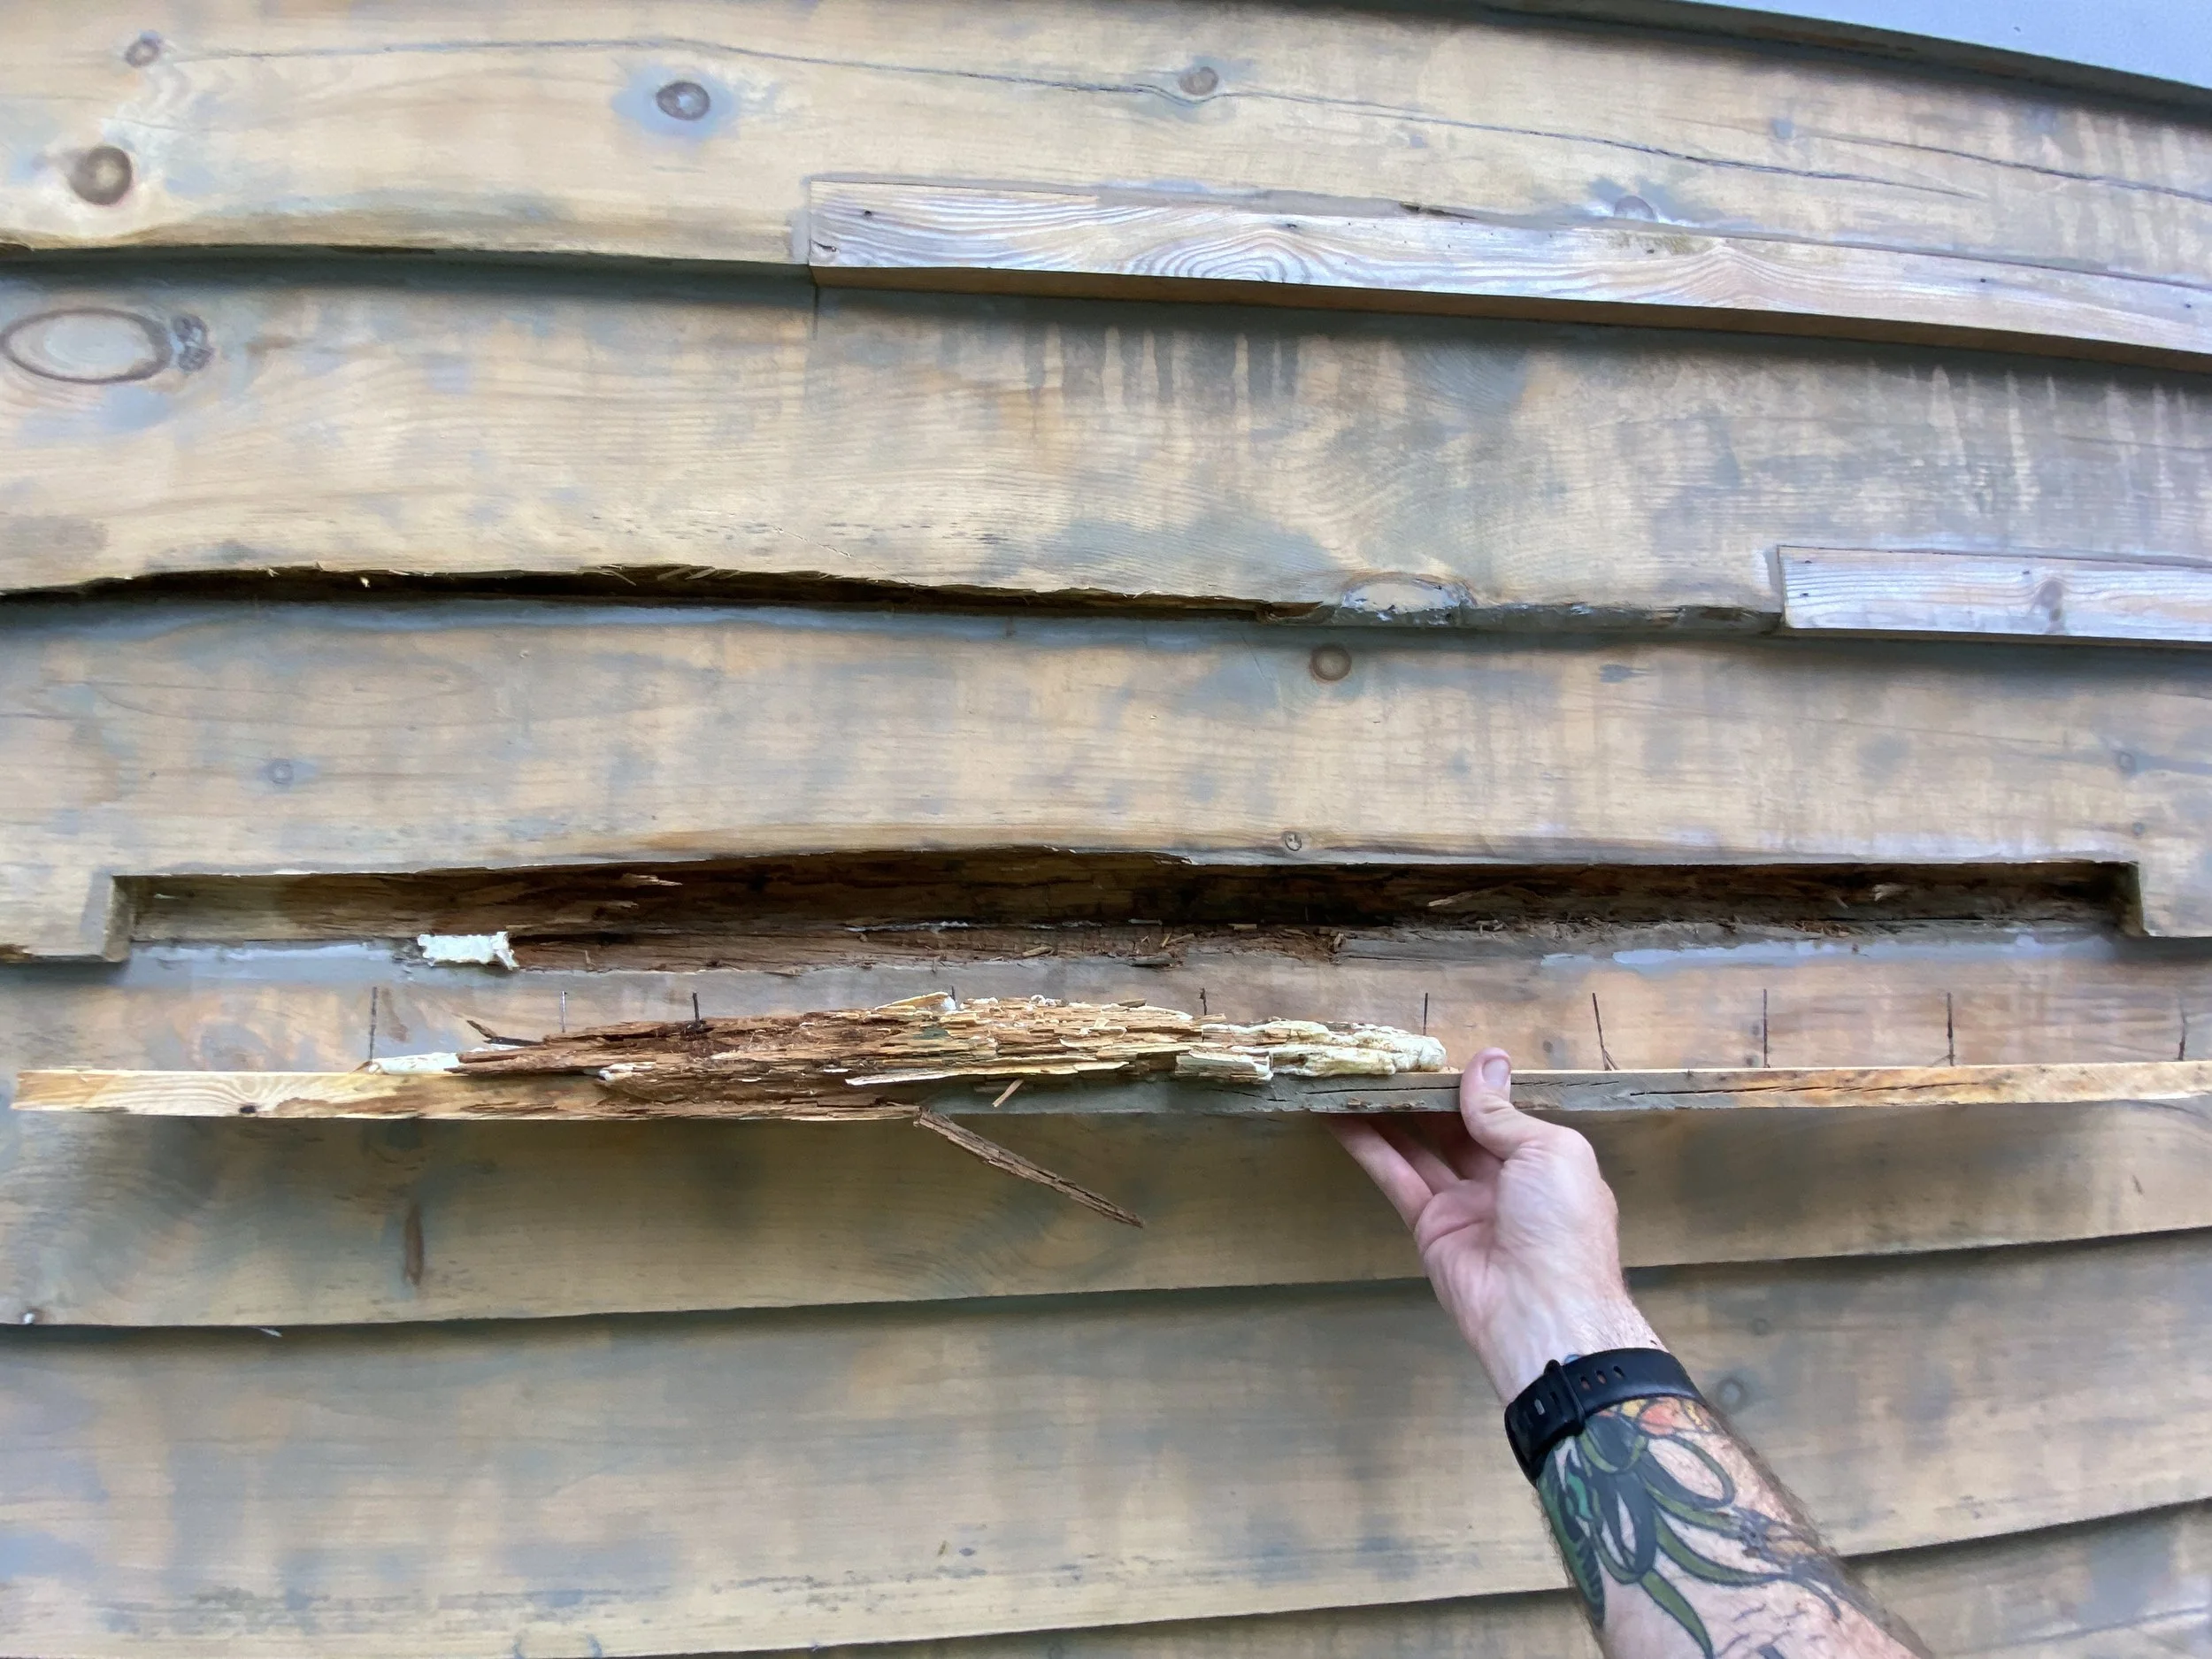
This was a repaired section, done by the log home repair company we paid thousands of dollars. See that rot behind the new wood that they never scraped out??? Yeah, me too. It’s true what they say: if you want something done right, do it yourself.

Here is the wall, at this point finally sanded down to bare wood! The rotted section above visible toward the top of the photo.

Here is a closer pic of the repair on that section that I had to redo. My cuts maybe aren’t as good as them, but at least there’s no rotten wood behind it anymore.

Sanding is a dirty job. I washed my hands and it really showed the dust on my arms. Looks like I have a long-sleeve shirt on!
Scroll down for a step-by-step of sealing up a “check” - a crack in the wood that occurs naturally over time from the log drying out and swelling/shrinking with the seasons.
After digging out any existing sealants, add foam backer rod into the crack, apply painters tape to the tops and bottoms of the crack, fill with flexible sealant, then peel the tape!


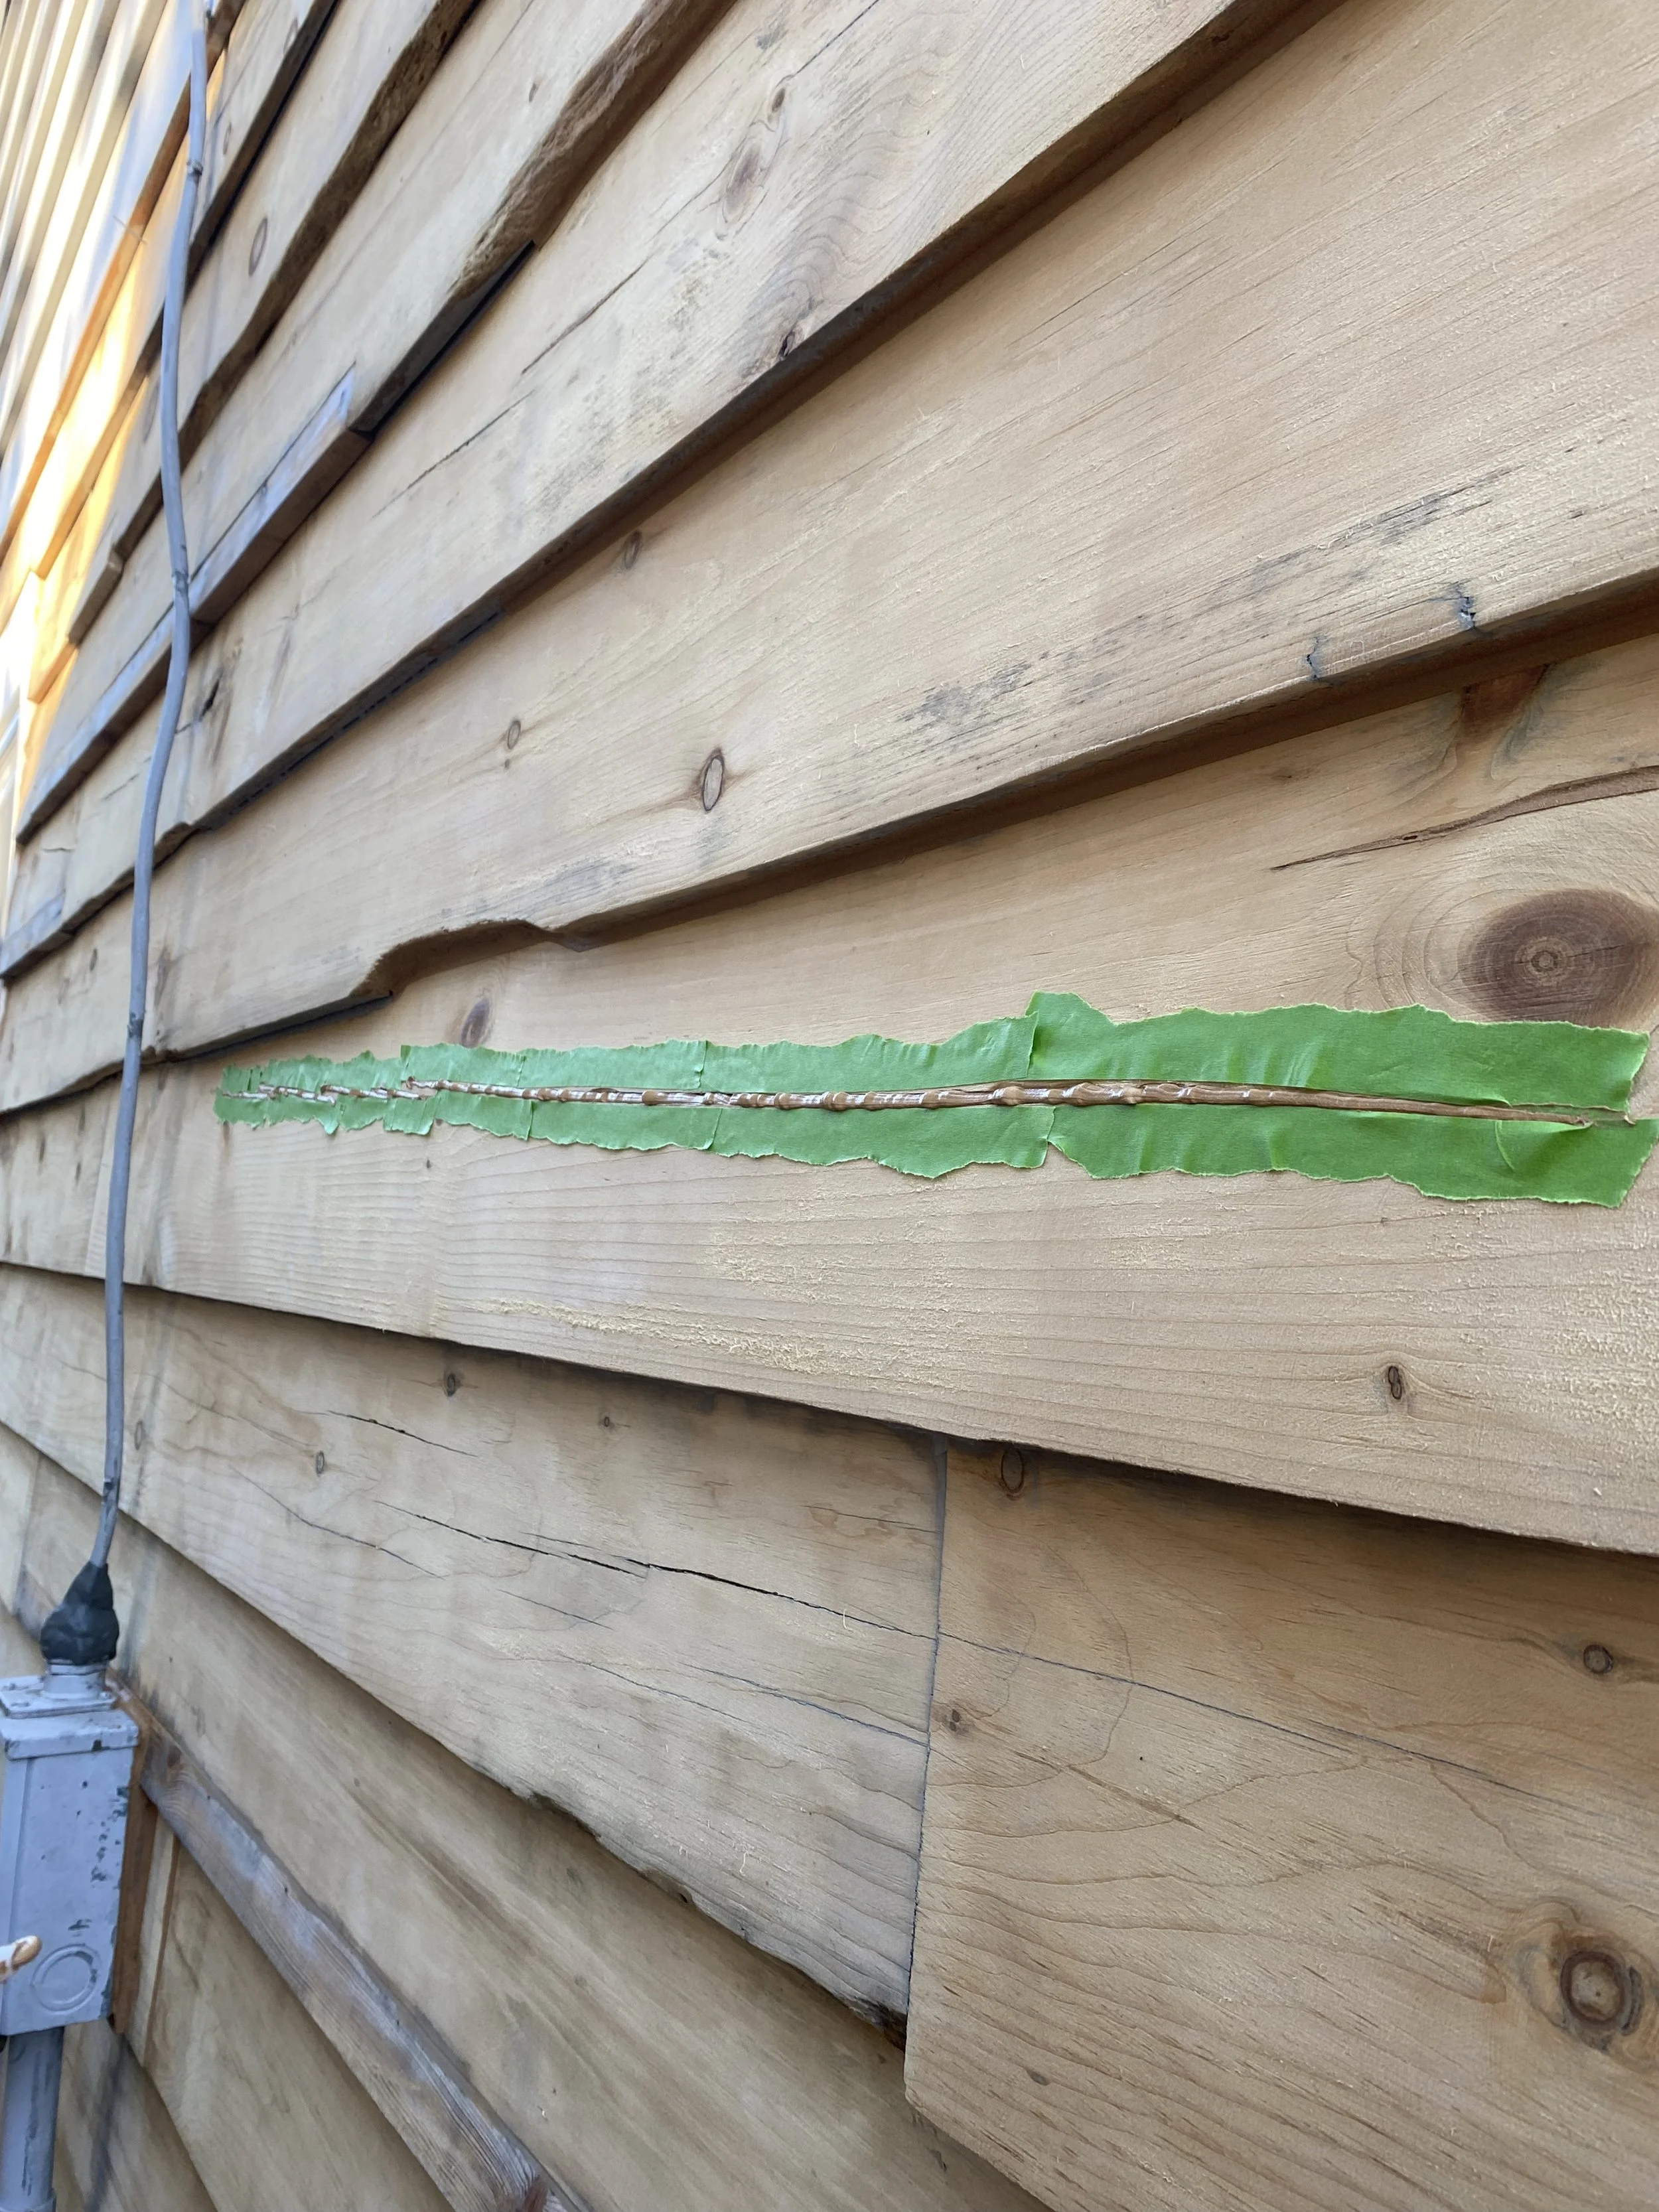

Relatively simple and easy. But extremely tedious and time consuming! Just like the log repair. It’s pretty simple and easy but you need to overcut the rotten section, then cut a new piece of wood to fit in exactly. Tough to do and takes a ton of time since there are many sections of log to repair and many checks to fill in. Worth it in the end though. Looks nice.

During this 2-month effort, every time it rains pretty much I had to cover the walls. Especially toward the end when you need a few days in a row that are dry enough to apply the wood treatment, stain, and top coat - which are the final steps! and here they are:

Our neighbor Jim wanted to help out with the staining. Thanks Jim!

We went with Lifeline Ultra 7 stain in the “chestnut” color. A deeper brown helps reflect UV rays to keep the wood in better shape, and also looks cozier than a lighter stain. The 2nd floor is actually frame built like a normal house. Thinking we’ll paint it white when the logs are all done and have a two-tone house with black gutters and shutters.

And here it is. All done! 2 months of work and this side is completed. Only 3 more sides to go!

Onto the front of the house.
Wish us luck!